
FileEmbroidery buttonhole stitch perle cotton.jpg Wikipedia
With this stitch you are actually constructing a layer of fabric over the foundation fabric adding texture or high relief to a piece. Stretch the fabric in an embroidery hoop as it is important to work this stitch at an even tension. How to work Detached Buttonhole Stitch. To work the stitch you first lay a line of foundation stitches down.
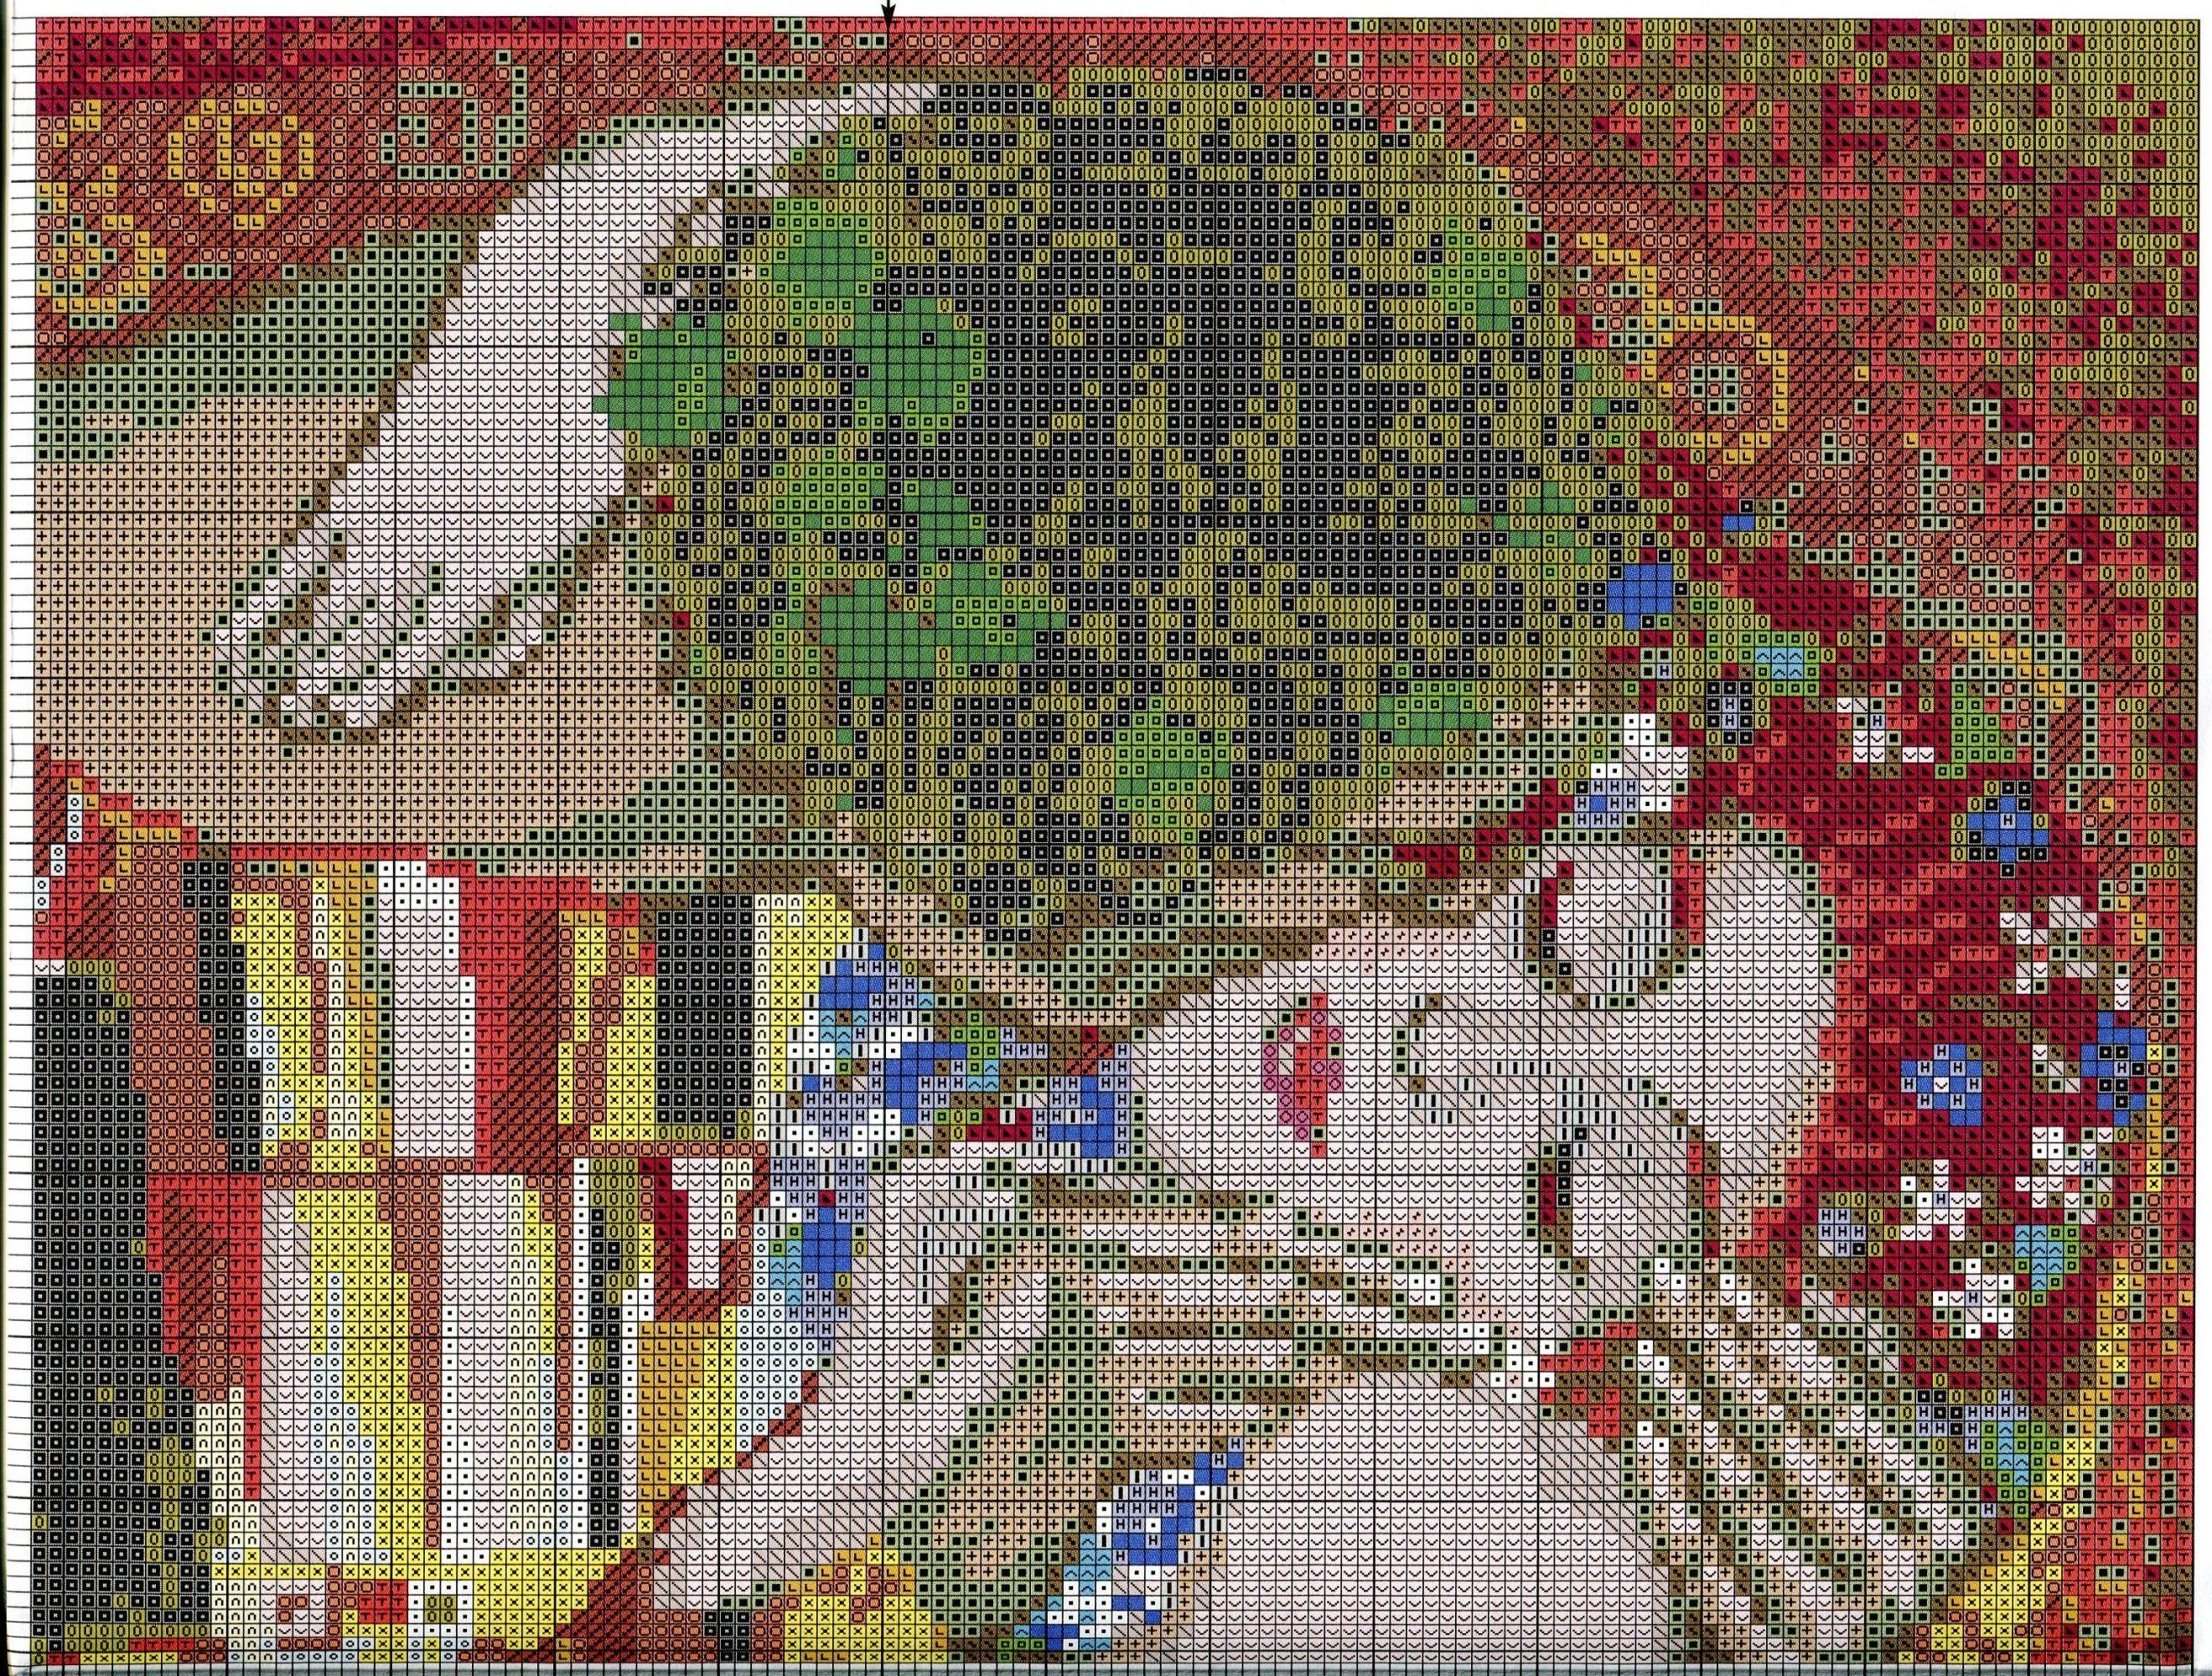
Free Cross Stitch Pattern G.Klimt “The kiss” DIY 100 Ideas
Begin Buttonhole Stitch. Mollie Johanson. With the thread still anchored from the running stitch, bring the needle up through the opening in the fabric. Insert the needle through the fabric just outside the running stitch, then bring the needle back up through the buttonhole opening. Pass the working thread behind the tip of the needle.

Пин на доске Пряники
Wrap the thread 3 times around the thread loops between the button and fabric. Go to the back ( push your needle through the thread of the shank. Pull the needle and thread all the way through) and finish off. You can sew the stitches across the buttons in many ways, as seen in the picture below. 2.
.svg/1200px-Stitch_(Lilo_%26_Stitch).svg.png)
Stitch (Lilo & Stitch) Wikipedia
1.To make the buttonhole by hand. When you make the buttonhole (handmade) you should first mark the buttonhole, make a small running stitch around this mark, cut open the hole and make this stitch the real buttonhole stitch all around the hole. The knot of this stitch along the edge of the buttonhole will really protect your buttonhole from.

Pin on kanaviçe
To work a simple yarn-over buttonhole, like I did for the Storyline cardigan, work the rib in pattern to the central stitch, work [yo, p2tog], and then continue the rib to the end. This will create a buttonhole large enough for a 1″ diameter button, though I decided that 3/4″ or 7/8″ button were more suited for this cardigan.

The Papercut Collective How to stitch on a button
Bring the needle up through the first hole again and pull the thread all the way through the fabric. [2] 8. Strengthen the button. Repeat the sewing process enough times to make sure the button is securely in place. [3] 9. On the last stitch, push the needle through the material, but not through a hole in the button.

so september new stitch sampler buttons from septemberhouse
Book "Tiny Stitches: Buttons, Badges, Patches, and Pins to Embroider" by Irem Yazici, Cross Stitch Patterns, Embroidery Patterns, Embridery. (20.4k) $20.01. Sew She Did! Cross Stitch Kit Design by Lori Holt #ISE-404 from It's Sew Emma Stitchery, Counted Cross Stitch. (227)

Stitch buttons onto your sewing projects with colorful embroidery thread Sewing
Measure where your buttonholes will go and mark the three lines box on the fabric with a tailor's chalk or pencil. Cut a small slit just big enough for the button to fit through using scissors or an X-Acto knife. Use an embroidery needle and thread to carefully stitch along these lines in a zigzag pattern until you reach the desired length.

Somerset Stitch Quick Stitch Project Harris Tweed Flower Button Stitch projects, Button
And then simply count how many stitches you need until you hit the farthest hole in the button (in the example above, that would be 4 stitches). You measure the distance from the edge of the button to the farthest hole in the button and multiply that by your stitch gauge. Ie. stitch gauge = 2.1st/cm; 2.1st/cm x 1.8 cm = 3.8 st

Food Experiences, Lefty, Online Portfolio, Stitch Design, Storytelling, Web Design, Behance
Take a ¼-inch (6-mm) stitch between 2 leaves. Cast on the following pattern of knots: 2 double stitches and one 3⁄16 inch (4 mm) picot for the first knot/complete the second half of knot; repeat this pattern for a total of 5 picots, ending with 1 double stitch. Work 2 more buds under the remaining edges of the leaves.

STITCH ! Handmade Swarovski crystal / button frame. www.theshabbychicgeek.co.uk disneygifts
Step by Step Pictorial Process of making the buttonhole stitch. 1. I have worked this on two horizontal lines, you can work in any direction. Bring the thread up at point A. Insert the needle from point B to point C as shown above. 2. Pass the loose end of the thread under the needle as displayed in the picture above. 3. Pull the thread up gently.

Design Of Button Stitch ( Flower ) YouTube
Create the First Stitch. Bring the needle up and make a straight stitch across the width of the buttonhole, starting from the bottom and ending at the top. After that, bring the needle to the backside of the fabric, but before pulling the thread tight, pass the needle through the loop of thread that's formed on the fabric's surface.

The Papercut Collective How to stitch on a button
Step 4: Create the Shank. For the 4-hole and shank buttons, you need to make a shank. Its purpose is to give the joining fabric room to lay flat underneath the buttons. To do this, insert a toothpick in between the stitches under the button. For 4-hole buttons, you need to do 3-4 stitches for each pair of holes since you want it sturdy and secure.

Love the stitch design on these K&B baubles Needlework christmas, Needlepoint patterns, Cross
Buttonhole stitch has been handed down from the days of tailors and dressmakers dependent on their own skills to complete garments. This article will show you how to do buttonhole stitch step by step for beginners. Nowadays, the buttonhole stitch has become a piece of decorative embroidery used for 'cut work' like Hardanger and for edging in some embroidery designs.

Shoes in different colours. Pony Bead Patterns, Beaded Jewelry Patterns, Beading Patterns
Button Stitch Designs ; Filter. Brand . Filter Button Stitch Designs (1) Button Stitch Designs. Sort Fields. 1 products found, displaying products 1 to 1: Quick View. Button Stitch Designs Easter Mini Pennies BSD110B . $3.00 . Select Options. Share your Prairie Point Junction creations #prairiepointjunction.
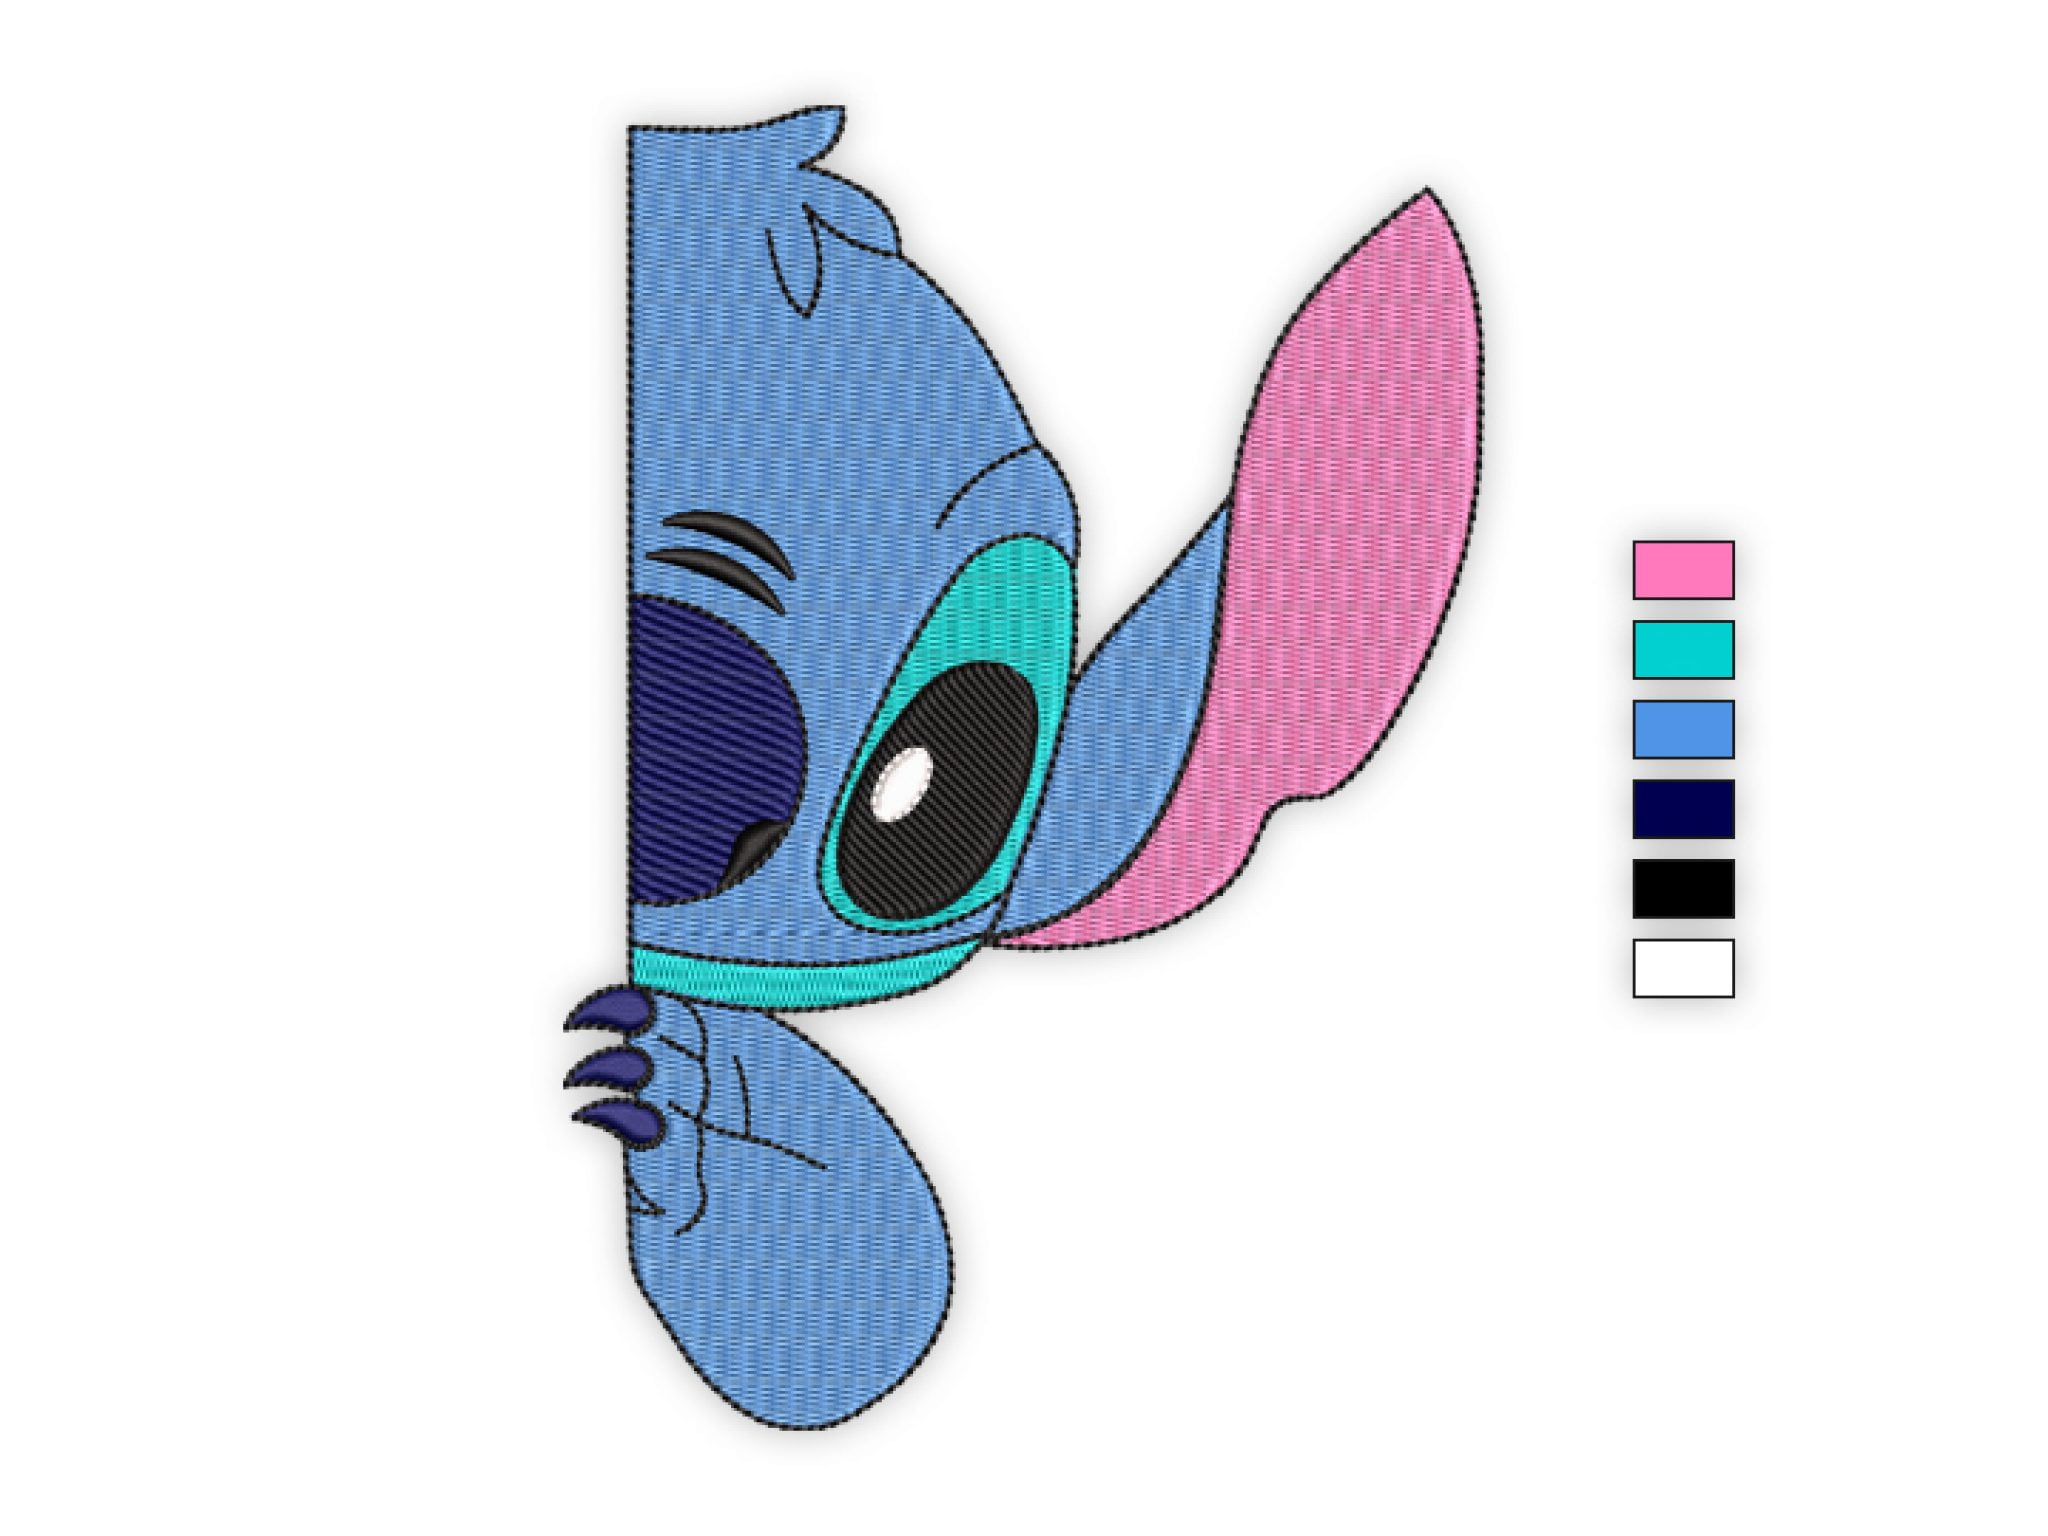
Stitch Embroidery Design Premio Embroidery
Consider how many buttons you want to make. If you're making the #24 size, you will need approx. 5/8" in between each. 2. Mark the size of the button on your fabric to determine where to embroider. Normally markings are made on the wrong side of the fabric, but in this case that wouldn't be very helpful.